


How to landscape a garden on a budget including plants, sleepers and pebbles
Scabiosa, bee-approved beauty of a flowering plant.
Want to know how I landscaped our Cornish garden on a budget? Read on for my garden design ideas and inspiration, including the plants, garden furniture, oak sleepers and stones we used in our garden makeover project.
I've shared various snippets of our garden transformations over the last several months, but until now haven't managed to get it all down in one place. I've been waiting to take 'the right shot', for the weather to be just right, but in doing so time has gone by and some of the beautiful plants have finished flowering. So I decided to just get my shit together and write this post! It's going to be a long one and very photo heavy, but I hope you enjoy following the journey we have been on to get to where we are now.
The garden project was divided into two phases, the first is the space immediately outside the extension, the area that was most affecting us day to day. The second phase, the She Shed, Man Shed (better known as the rotten, evil looking thing in the corner!), Playhouse etc will happen later this year, or more likely next year now.
How to get started with a garden makeover
I did some clearing last year, talked about more in my previous blog post, The art of Compromise. I removed some trees and a very overgrown waste of space 'flower bed' that took up over a metre and a half of the garden, the full length of the wall.

The garden before the makeover
Back when Stu's woodstore addiction got a little out of hand! This was several years ago.

Garden makeover, Phase 1. Alice in Scandiland

Garden makeover, Phase 1. Alice in Scandiland

A budget home extension using a modern conservatory
You can just make out the view of one of the old woodstores, the garden felt cluttered and messy.
Work on the extension finished last September and so we got on with living our new and improved life and with winter approaching gave the garden little thought. I was contented, for the time being, with our new internal space. You can read much more about that in the massively detailed post I wrote about the build process - How to extend your home with style, for less than you might think.

Garden makeover, Phase 1. Alice in Scandiland

Garden makeover, Phase 1. Alice in Scandiland
But of course, I wasn't going to be happy looking out at the sad, ugly garden for long, so earlier this year I started formulating a plan, gathering inspiration (you can follow my Pinterest board here) and sweet talking my husband!
Garden landscaping inspiration
This was what we started with back in June -

Garden makeover, Phase 1. Alice in Scandiland
And my plan -

Garden makeover, Phase 1. Alice in Scandiland

Garden inspiration images from Pinterest
Photos -
Stu was onboard with pouring our own giant concrete pads, to form a simple, low maintenance patio outside the extension and this is what we started work intending to do.
I wanted a large raised bed as really there aren't many other areas I could plant in the garden. I think it's important in a smallish space to make some big statements. We're fortunate to have a large grass square at the front of the house, where the girls can ride bikes, kick a ball around, so there was no need for keeping open spaces in the back garden.

Dry stone wall in the garden
The girls were very keen to help out.

Removing a tree stump took ages!
This bastard of a tree stump took two of us many hours to remove.

Dry stone wall and removed stump
We're so fortunate to have this beautiful drystone wall at the back of the garden. It's spent many years almost completely hidden, overgrown, but after a lot of effort it's now shown off to its full glory.

Beginning to paint the fence
Scandinavian style garden design
I had been admiring black fences on Pinterest and knew this was exactly what our ugly, scruffy fence needed. It's very well built, by my husband, but was looking very sorry for itself. Stu took a bit of convincing, but I marched off to Homebase and bought a big tub of Cuprinol Ducksback in black and just got on with it. Stu was in love within half an hour of me starting to paint.

Painting the garden fence using Cuprinol Ducksback in Black
The black makes a real statement and turns this old fence into something new and exciting. It's rather magic how colours just pop against the dark, matt background.

The sleeper bed was also painted using Cuprinol Ducksback
The ground level was dug down several inches to allow for the thickness of the slabs we intended to pour. We used this soil to fill the large raised bed.
It was part way through groundworks that Stu had a massive change of heart and declared that he no longer wanted to use concrete. His concerns were both financial and the level of work involved. To say I was a bit pissed off would be the understatement of the century, I was fuming! I was working to a plan and could see exactly what it was going to become.

Garden makeover, Phase 1. Alice in Scandiland
But, as ever, I had to remind myself that there are two of us living here and it's as much his garden as mine (grrrrrr!!!) so it was back to making a new plan, a compromise.
Landscaping a garden with sleepers and pebbles
I begrudgingly went along with Stu's opinion, which was to have gravel, but I convinced him that pebbles would be better, both practically (there are a few cats in the area and we all know what they like to do in other people's gardens!) but also for comfort under foot and overall look. I also stipulated that this new plan would have to include the beautiful, rather ££ Oak railway sleepers we had admired at the timber merchant (The Timber Store). Somehow Stu agreed, so my initial annoyance over the changes started to diminish a little.
After much market research we decided on Scottish Pebbles and bought two large dumpy bags approx 800kg each), 1 of 20-40mm and the other 30-50mm. We bought online from Proturf, as they were the best price inc delivery, but I experienced a few problems inc totally rubbish customer service and so would not recommend them.

Scottish pebbles dry and wet
Dry/Wet - when they arrived I was less than happy about the brownness of the
when wet, but they have grown on me since.

Oak sleepers ready for use as stepping stones
I love the variation in the colour of these Oak sleepers, as well as the knots and gnarly bits. We used cheaper green wood
to make the raised beds, which I then painted with the
.
So the new plan was drawn up and we ploughed on.

Garden makeover, Phase 1. Alice in Scandiland

Laying out the sleepers for our garden makeover
The
were cut into random lengths then we set them out so that they form a walkway across what would be a sea of pebbles. We both took it in turns to pace across, making sure the pieces of wood allowed for a comfortable, natural stride.
The wonderful fortnight (or possibly longer than that) of early glorious summer weather we had been experiencing passed, replaced by torrential rain, but we were like things possessed, every spare moment was spent in the garden working towards our end goal and when we weren't out there we were caught up in discussion about one element or another, enjoying the Chelsea Flower show coverage on TV, gathering more inspiration.

Choosing plants and succulents for our garden makeover project

I knew I wanted natural looking, sporadic planting, so after a trip to one of my favourite local garden centres, Pengelly Plant Centre, armed with some Alpines, Succulents, herbs and grasses, I set about placing them, planting out (cutting the weed suppressant matting underneath to allow them to root properly) and then filling around with the pebbles.

Garden makeover, Phase 1. Alice in Scandiland
It took almost a day to move all the pebbles from out the front of the house, to the back, with one wheelbarrow, that's a lot of back breaking shovelling and I was soaked through to the skin, but it felt really good being out and feeling the ache of physical exertion when you finally got to collapse into bed at night.
Finally we had banished the mud and pulled the house and garden together, one making the other all the more special.

Garden makeover, Phase 1. Alice in Scandiland

Garden makeover, Phase 1. Alice in Scandiland
The table we made is one of my favourite details, you can read and see lots more about its construction here.

Enjoying the garden table in our small garden in Cornwall
I'm completely in love with this vintage cane chair, picked up locally for £7, make sure you check Facebook Marketplace regularly, there are some real treasures to be found.
The process of transforming our outside space has been quite therapeutic for me. We are by no means finished, but that's the magic of a project like this, it can only get better with time and attention. I think it has brought Stu and I closer, though perhaps also slightly broken Stu's back!! but we get pleasure from all our hard work every single day, whether we're out there eating dinner at the table we made together, or admiring the view from inside.

Garden makeover, Phase 1. Alice in Scandiland

Garden makeover, Phase 1. Alice in Scandiland

Garden makeover, Phase 1. Alice in Scandiland
Choosing garden plants for our Scandinavian-style garden
The planting isn't finished yet, but I doubt it ever will be. A garden is an ever changing place, somewhere to experiment and learn.
I've stuck with mostly greens and purples, I wanted the space to feel calm and have things of interest all year round, so I plan to add in some more plants in the autumn, when I can visit the garden centre and see what's looking particularly lovely then.

A bug hotel in our Cornish garden
Bargain Bug hotel from
.
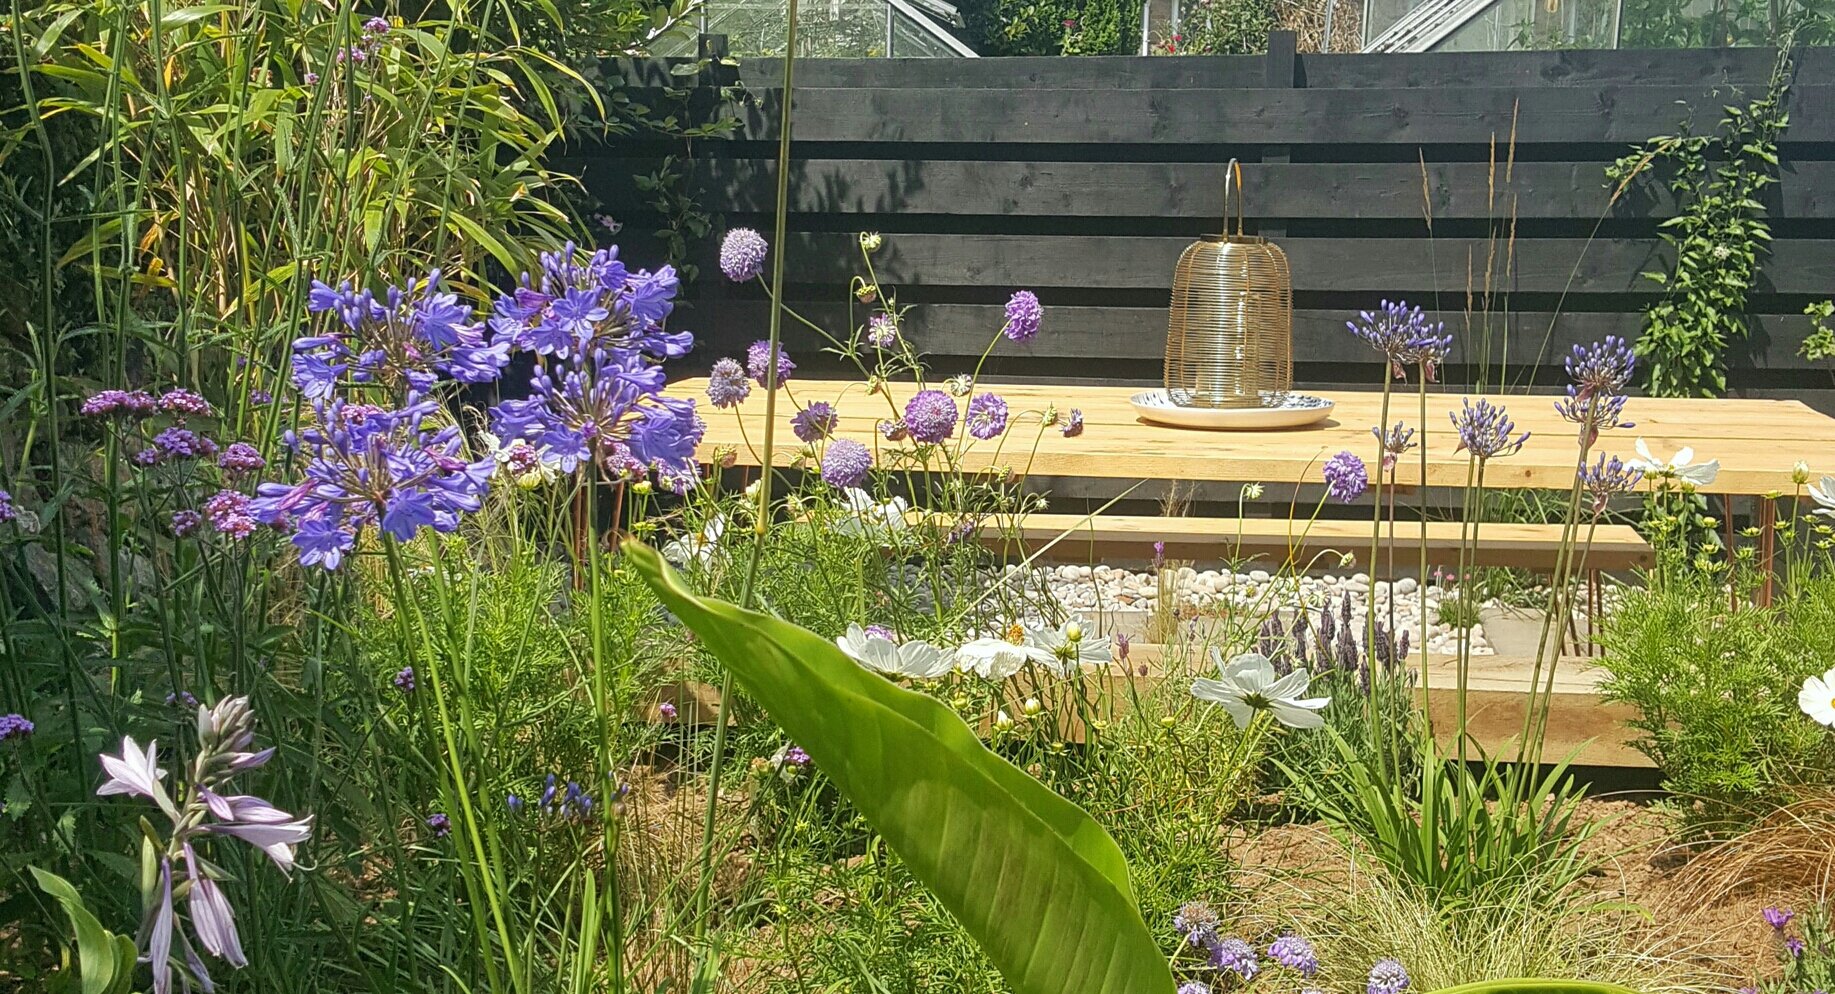
For now I have used Cosmos (Lidl bargains, they just keep flowering and flowering!) Scabiosa (my total fave and a massive hit with our ever increasing bee population) Verbena, Lavender, Thyme, Agapanthus (synonymous with Cornish gardens) Hostas, Bamboo (safely contained in a large sunken barrel), Banana, Sea Thrift, Sedum, Saxifrage.
We also have Blueberry and Black/Red Currant Bushes, which until now have lived a sad life in ugly plastic pots, it feels good to give them their own permanent home.
I've planted herbs in places that will get brushed against or stood on occasionally, so you get a lovely aromatic waft as you pass, Jasmine is climbing the fence and I hope next year it will be big enough to fill the garden with it's sweet scent.

Garden makeover, Phase 1. Alice in Scandiland

Sitting outside around the fire pit
That day I pretended Ercol made garden furniture!
Link for a similar firebowl as I've already been asked a bajillion times on Instagram!
Wow, if you made it this far well done and thank you! I'm sure I've missed lots out, so please ask if you have any questions.
I hope you enjoyed this insight into our most recent big project, I'm so happy to be at the point of properly sharing with you, as well as enjoying our new space, it's a very healing thing, creating a garden, I feel I have poured some of my soul into it and every new flower or little bee I see is like a positive affirmation, that it was the right thing to do, that it is appreciated and enjoyed by many.
Don't forget to Pin this post to come back to, are you planning a garden transformation soon? Perhaps you've already done one. I'd love to hear about it.
Head over to my shop for a selection of my favourite Scandi-inspired outdoor products like those seen in these photos.

Garden makeover, Phase 1. Alice in Scandiland
If you’ve enjoyed this stage of the garden makeover, follow the link below for what came next…

Garden makeover sources and shopping*
Plants from Pengelly Garden Centre
Follow my garden boards on Pinterest


